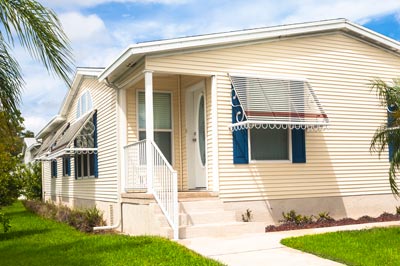
Do it yourself mobile home awning

Attachments can add a great deal to your home. Awnings, canopies and sunroofs let you enjoy the outdoors and carports add shelter for your car and other outdoor items. Yet, it's important to install these attachments correctly. In a windstorm, loose sheets of fiberglass or metal can cause damage to your home.
It's fairly easy to install an awning, carport, canopy or sunroof. You should receive detailed installation instructions with your attachment. Most attachments connect to your home on a type of track. Usually, a ledger board or ribbon board attaches to the wall of the home. A mounting strip on the board hooks into the side of the attachment.
Attachment checklist
- Slant the attachment so water is channeled away from your home. If it isn't slanted, water can leak into your home or collect under your home. A slant of 1/4 inch per foot is enough to keep water off your carport, patio roof, or canopy.
- Attach the awning or sunroof to wall studs. Don't just screw the attachment into the siding because it's not strong enough to hold it up on its own. A strong wind may not only tear off an awning or sunroof, but could tear off part of your siding too.
- Make sure the attachment can handle a load of snow, if necessary. Buy an attachment built for your climate. For example, a single pan roof might collapse under a large amount of heavy wet snow.
- Check that windows and doors open without scraping the awning or sunroof. Install attachments high enough so they clear open doors and windows.
- Anchor the attachment solidly to the ground. If you have a concrete slab, bolt the posts into the concrete. If you don't have a concrete slab, either anchor your posts with an auger or set them in concrete piers.
- Caulk or seal your attachment. Use a silicone caulk to seal the seam or flashing where your attachment connects to the wall. This easy step can prevent a slow leak from causing major damage.
- Anchor an unattached storage shed to a concrete slab or secure it to the ground with auger-type anchors. If your shed breaks loose in a windstorm, not only will the shed be damaged, but so will anything it crashed into – including your home.
CAUTION!
Before you install your awning, sunroof or carport, remember to:
- Determine the location of the wall studs. You must connect your attachment to the studs, not just the siding.
- Determine the location of the electrical wires in your sidewalls.
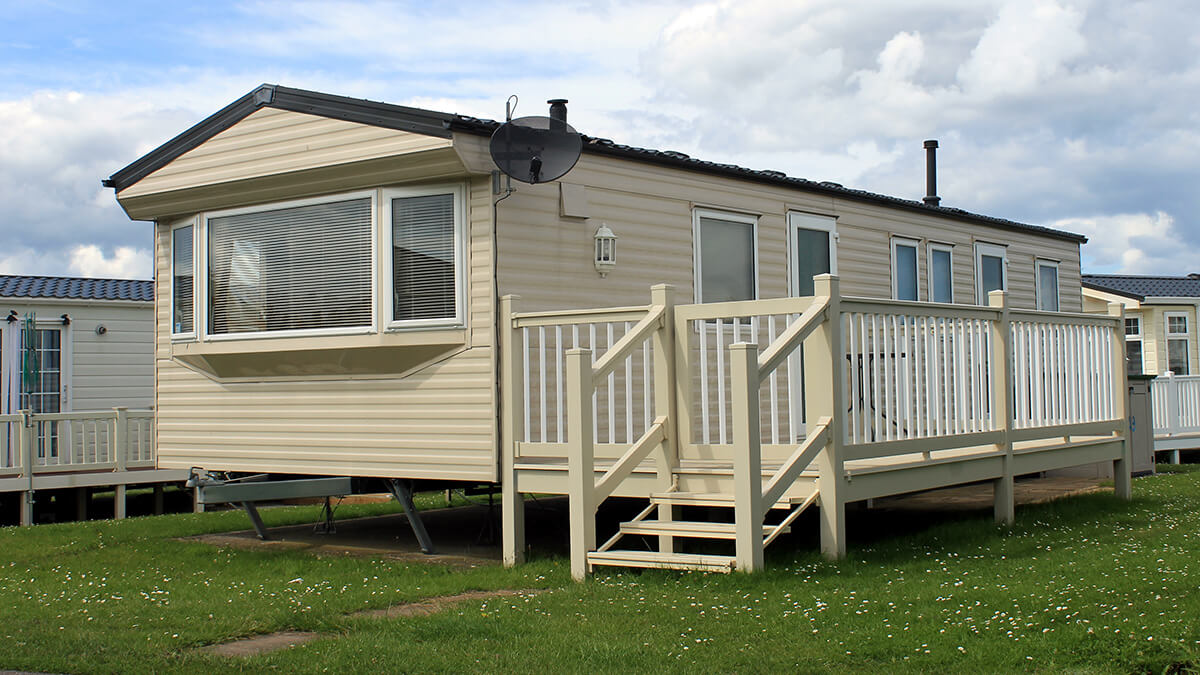
Support post attachment
Firmly attach the posts, poles or columns that hold up your sunroof, carport, patio cover, awning or canopy, to the ground. If loosely secured, a strong wind can lift up the entire structure.
Here are two methods to secure your posts to the ground. If you have a concrete slab or steps, use the first method, otherwise, use the second. Follow these instructions if you are installing new posts or reattaching your current posts.
Attach posts to concrete
If you do not have a concrete slab, you will need to attach your posts solidly into the ground.If you have heavy soil – not sand – an auger-type anchor might be suitable. These anchors, with a mounting plate, are often available from a carport or sunroof manufacturer. Check with a manufactured home supplier if you can't find any.
Step 1: Remove post
If you are replacing an existing post, use a pry bar to lift that post from the concrete. Do not reuse screws.
Step 2: Drill holes
Use the foot or shoes of your post as a guide to position bolts. Use a masonry bit on your power drill to drill holes in concrete. Start with a small masonry bit, then switch to larger masonry bits until the holds are 3 inches deep and about 3 times the diameter of the bolt. This means you will need to drill a 3/4-inch hole for a 1/4-inch bolt.
Step 3: Apply adhesive
Check to make sure the holes still line up with the holes on the foot or base of the pole. Then, brush some construction adhesive inside the holes.
Step 4: Install shields
Insert the lag shields into the holes.
Step 5: Install post & lag bolts
Put the foot or base of the post over the holes. Insert the lag bolts through the postholes and into the lag shields. You do not need to wait for the construction adhesive to dry. Tighten bolts with a wrench. The lag shield will expand as you turn the bolt.
Attaching in ground
A better method of attaching your posts is to dig a hole and fill with cement.
Step 1: Dig holes
Be sure to check with the local building inspector regarding the best method of installing posts for your soil conditions. Find out if there are requirements for the size and depth of footings.
Caution!
Locate any buried gas, water, electrical or cable hookups.
Dig a hole for each post. It should be approximately 16 to 32 inches deep by 12 inches wide, depending on the size of the post supplied by the manufacturer. If you have many postholes to dig, or if your soil is particularly firm, you may want to rent an auger or clamshell-type posthole digger, or even a power-driven auger.
Step 2: Pour cement
If your posts are long enough, set them upright in the hole before you pour cement. Tamp the cement well, and slope away from posts. Allow cement to solidify before installing sunroof, carport, awning or patio cover. If you move the posts, you will enlarge the holes.
Step 3: Position bolts
If your posts are not long enough, pour the concrete. Before it solidifies, level the surface. Lightly press the foot or base of the post on the wet cement to make an impression mark to position the bolts. Put a washer on the bolt, and position it next to the head of the bolt. Push the bolts, upside-down, into the cement. The bolts should be embedded in the cement at least 2 inches. Let the cement harden before installing the base or foot of the post. Use lock washers and nuts to attach to bolts.
Related articles
You may also like
Mobile home siding cleaning
Regular maintenance will keep your mobile home siding looking new and last longer. Use our quick tips to keep your siding looking good.
What's lurking below your mobile home?
Do you remember when you were young and had to check under your bed for monsters before you could go to sleep? I sure do!
Do it yourself mobile home awning
Get quick tips on how to install a new awning, carport, or sunroof to your mobile home from Foremost Insurance.