Fixing damaged mobile home wall panels

Mobile home wall panels can be damaged by stains, holes or gouges. If the area is small, you can find a way to avoid replacing the whole wall. To find a matching panel, check the data plate for the name and address of your manufactured home manufacturer. The company may still have matching panels available for purchase. Or, pull a matching panel from a closet or out-of-the-way place.
If you can't match the panel, try one of these alternate repair methods.
- Hang a painting, plaque, clock, mirror or wall-hanging over the trouble spot.
- Run carpeting up the lower part of the wall, using a remnant or carpet tiles. This will add color and softness to your décor while protecting the wall from nicks and scars.
- If the damage is near the floor, cover up with baseboard.
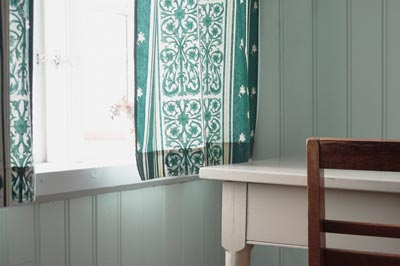
- Apply fabric to match curtains or throw pillows. Apply to the damaged panel only, or to several panels to create a design.
- Replace marred panel with a contrasting panel – e.g., a burlap panel or a wood panel on a sheetrock wall.
- Cover with wallpaper.
- For damage on the lower half of the wall, add wainscoting over the panels.
CAUTION!
Make sure your home is level before installing interior paneling. Some paneling is not made for manufactured homes. Check the reverse side of the panel for any warnings. Determine where the electrical wiring is before you pound in that first nail.
Materials you will need:
- Plywood paneling with a 200 flame spread rating
- Molding rabbeted to fit over edge of panel
- Panel adhesive
- 1 and ¼ inch finishing nails
Tools you will need:
- Level
- Measuring tape
- Hammer
- Keyhole saw
- Power saw or handsaw
Fix-it tip!
When trimming wood panels with a power saw, cut with the finished side down. When using a handsaw, cut with the finished side up. Put masking tape over the area to be cut. This will help prevent splintering and rough edges. But first make sure the tape will not destroy the paneling when it is removed.
Installing wainscoting
Step 1: Measure & Remove Battens
If there are batten strips between panels on your wall, remove them from wainscoting area for a smooth surface. Battens cover seams; they have no structural significance. Use a keyhole saw to cut the strips above the wainscoting line, leaving space for the top trim molding. Pry off the lower lengths of batten strips, but leave them in place between panels on the upper wall.
Step 2: Cut & Install
Wainscoting height can vary according to your needs. Start in a corner. Cut panels so lengthwise edges meet over wall studs. Use level to be sure the first panel is straight up and down.


